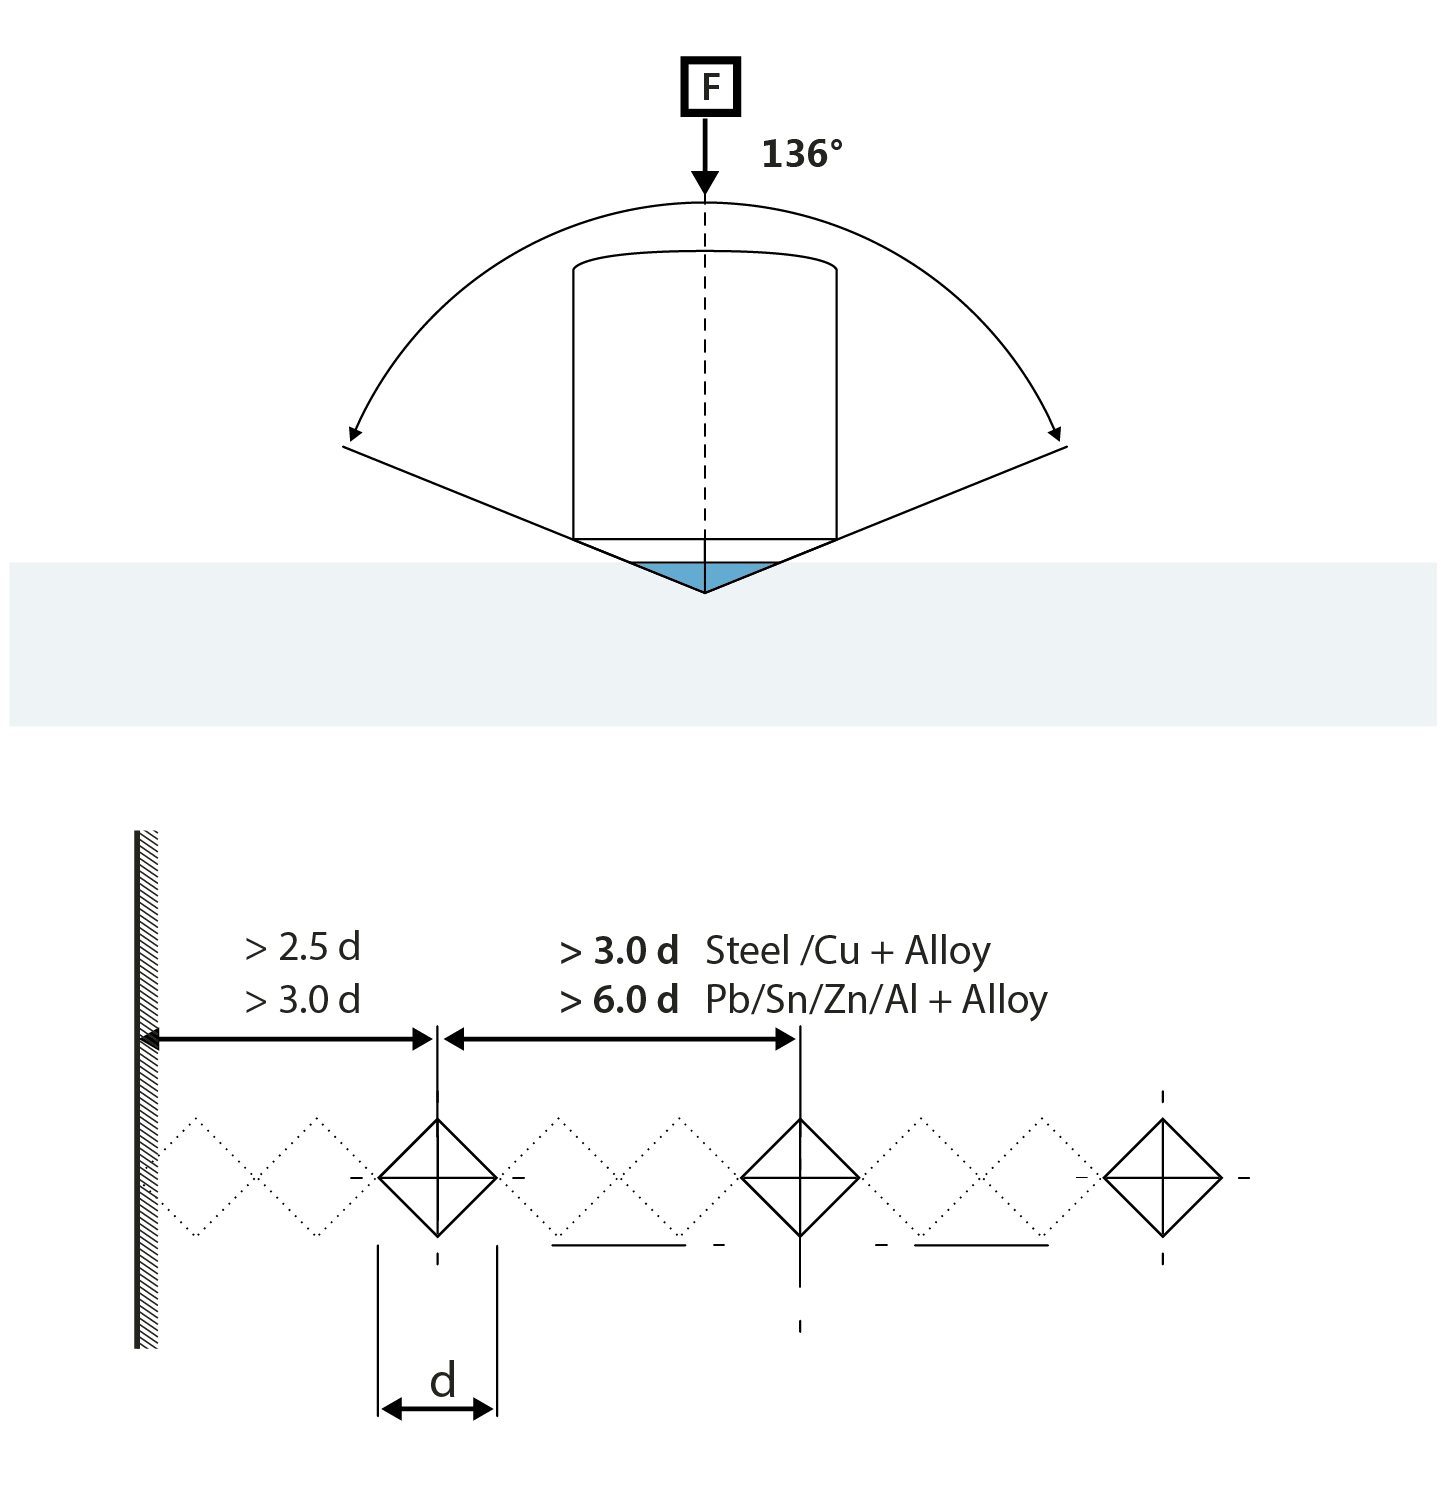
Vickers hardness testing is a hardness test that has been developed in 1924 by the company Smith and Sandland at the Vickers Ltd company. It has been developed to be an alternative to the Brinell hardness testing method to measure the hardness of materials. The Vickers hardness test is usually easier to use than other hardness testing methods, as the required calculations to obtain the hardness result are not depending on the size of the indenter, while at the same time the indenter can be used for all kind of materials irrespective of hardness.
The measuring principle of a Vickers hardness tester, is to find result on the questioned material’s ability to resist plastic deformation from a standardized penetrator or indenter. The Vickers test can be applied on all metals and has the widest scales among indentation hardness testing.
The number of hardness given by the test is known as the Vickers Pyramid Number (HV) or the Diamond Pyramid Hardness (DPH).
The Vickers hardness indenter creates geometrically similar impressions, irrespective of size; the impression should show well-defined points of measurement; while the indenter has high resistance to self-deformation. The Vickers indenter diamond in the form of a square-based pyramid meets these required conditions.
Vickers hardness testing numbers are being reported as follows;
Vickers hardness are indicated as xxxHVyy; example 440HV30, or with the element of dwell time included as xxxHVyy/zz if the duration of force is different from 10s to 15s; example 440Hv30/20 in case of 20 seconds.
Individually stated;
440 is the calculated hardness number,
HV means hardness scale VICKERS
30 as the load used in kg.
20 as the loading time in case it differs from 10s to 15s
In what circumstances are Vickers test mostly used;
Vickers values are mostly independent of the test force, from 500gf to 50Kgf it is possible the results of the same material under test often will produce similar results irrespective of the test force used.
Vickers hardness tests are found to be very useful for general material evaluation, quality control of manufacturing processes but also in the research and development environment.
Hardness, under circumstances can be correlated to tensile strength for many metals and is an indicator of wear and tear resistance. When performing a Vickers test the distance between indentations should be more than 3 indentation diameters apart, to avoid influence in result between the work-hardened areas. Vickers hardness testing machines are commonly in operation for testing materials and components in the automotive and aerospace industry, for use in laboratories for the evaluation of samples or to conduct advanced testing tasks.
