There are four principal standard test methods for expressing the relationship between hardness and the size of the impression, these being Vickers, Rockwell, Brinell & Knoop. For practical and calibration reasons, each of these methods is divided into a range of scales, defined by a combination of applied load and indenter geometry. Select one of the below mentioned test methods for more details.
Vickers hardness testing is a hardness test that has been developed in 1924 by the company Smith and Sandland at the Vickers Ltd company. It has been developed to be an alternative to the Brinell hardness testing method to measure the hardness of materials. The Vickers hardness test is usually easier to use than other hardness testing methods, as the required calculations to obtain the hardness result are not depending on the size of the indenter, while at the same time the indenter can be used for all kind of materials irrespective of hardness.
The measuring principle of a Vickers hardness tester, is to find result on the questioned material’s ability to resist plastic deformation from a standardized penetrator or indenter. The Vickers test can be applied on all metals and has the widest scales among indentation hardness testing.
The number of hardness given by the test is known as the Vickers Pyramid Number (HV) or the Diamond Pyramid Hardness (DPH).
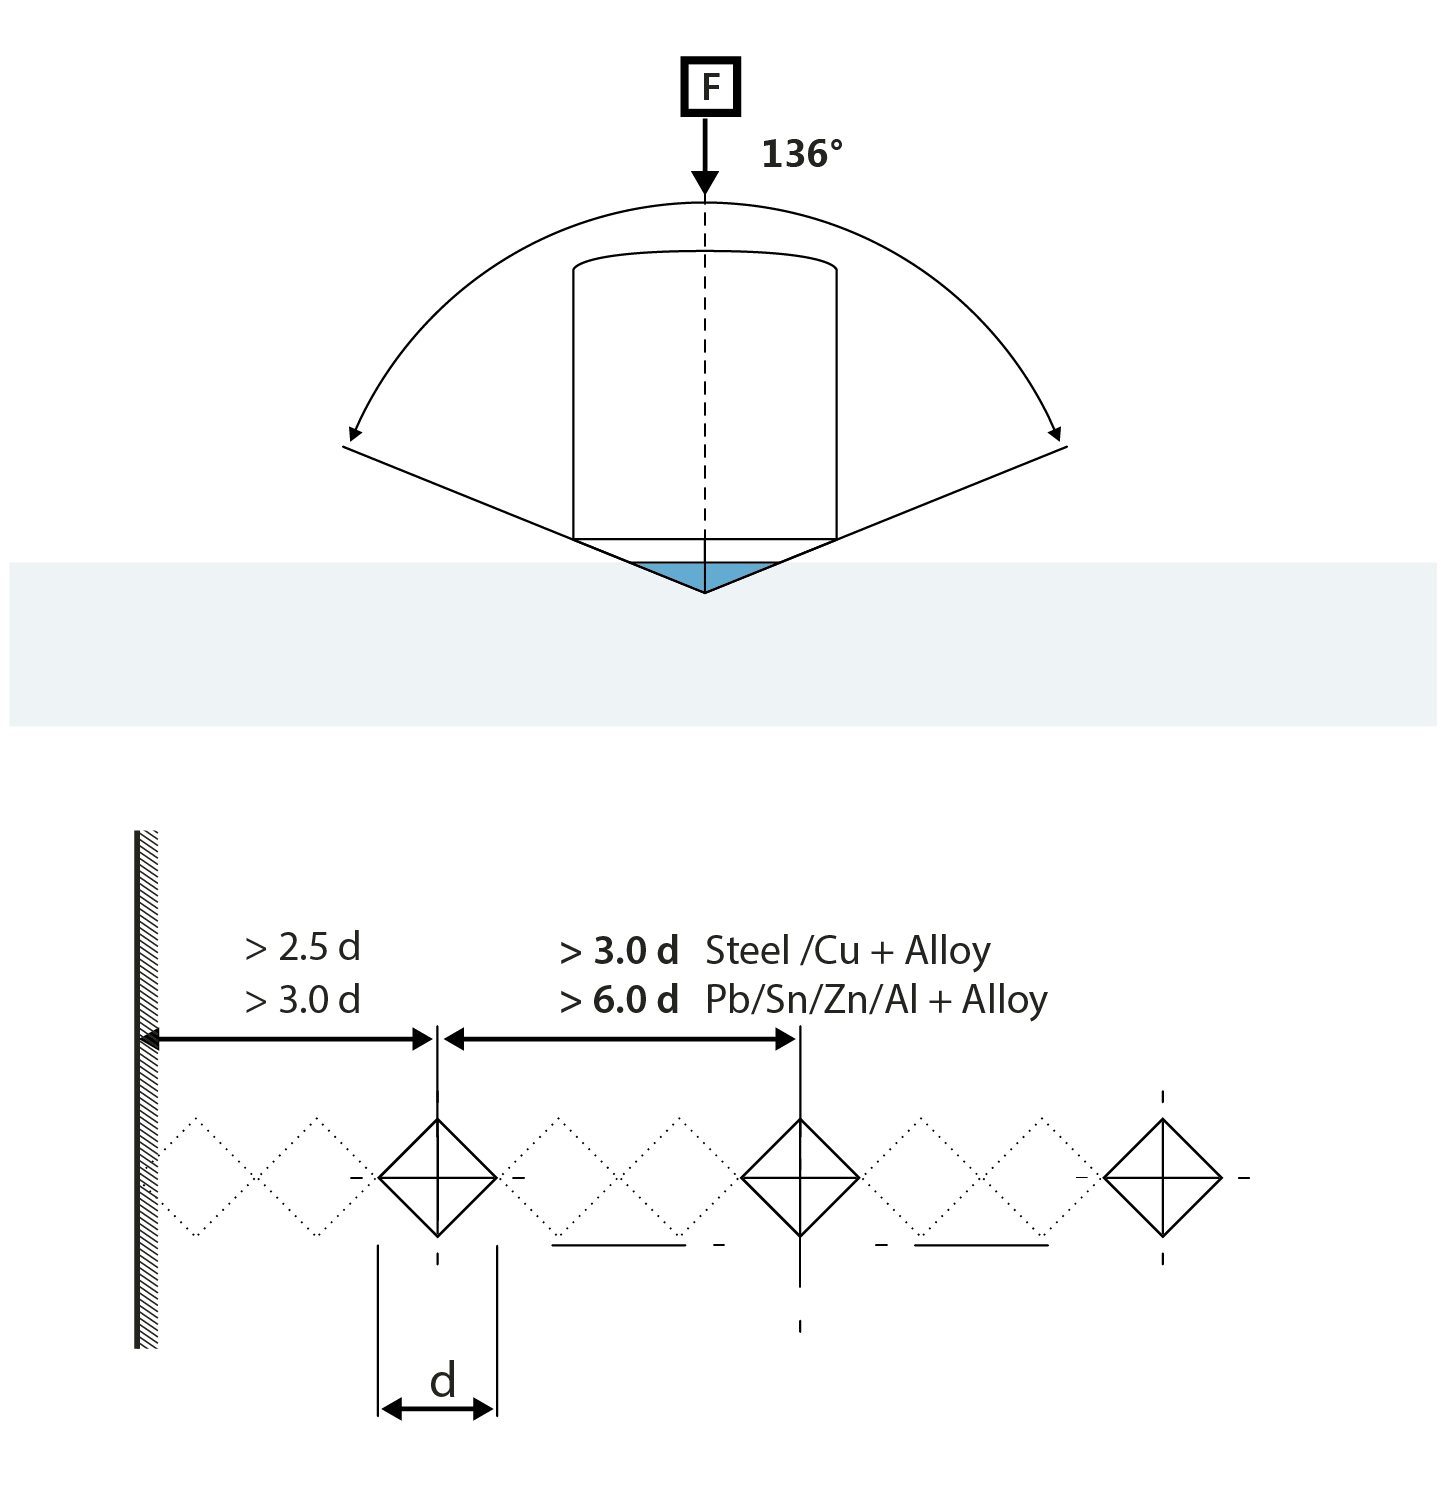
The Vickers hardness indenter creates geometrically similar impressions, irrespective of size; the impression should show well-defined points of measurement; while the indenter has high resistance to self-deformation. The Vickers indenter diamond in the form of a square-based pyramid meets these required conditions.
Vickers hardness testing numbers are being reported as follows;
Vickers hardness are indicated as xxxHVyy; example 440HV30, or with the element of dwell time included as xxxHVyy/zz if the duration of force is different from 10s to 15s; example 440Hv30/20 in case of 20 seconds.
Individually stated;
440 is the calculated hardness number,
HV means hardness scale VICKERS
30 as the load used in kg.
20 as the loading time in case it differs from 10s to 15s
In what circumstances are Vickers test mostly used;
Vickers values are mostly independent of the test force, from 500gf to 50Kgf it is possible the results of the same material under test often will produce similar results irrespective of the test force used.
Vickers hardness tests are found to be very useful for general material evaluation, quality control of manufacturing processes but also in the research and development environment.
Hardness, under circumstances can be correlated to tensile strength for many metals and is an indicator of wear and tear resistance. When performing a Vickers test the distance between indentations should be more than 3 indentation diameters apart, to avoid influence in result between the work-hardened areas. Vickers hardness testing machines are commonly in operation for testing materials and components in the automotive and aerospace industry, for use in laboratories for the evaluation of samples or to conduct advanced testing tasks.

The Rockwell hardness testing method as defined in ISO 6508 & ASTM E18 is one of the most commonly used methods within the metal working industry around de globe, to determine the hardness of a material. It is also used within the plastics, new composite or carbon materials processing industries.
By applying a Rockwell test, the permanent depth of an indentation produced by a specified force/load and a specified penetrator, brale or indenter is being measured with high accuracy.
The Rockwell test does not require a lot of of sample preparation therefore making it the fastest and easiest hardness testing method to apply across many types of industries world wide.
The best advantage of Rockwell hardness testing is its rapid speed of testing and to display hardness values directly after penetrating the material with no need of microscopic evaluation.
How to perform a Rockwell hardness test?
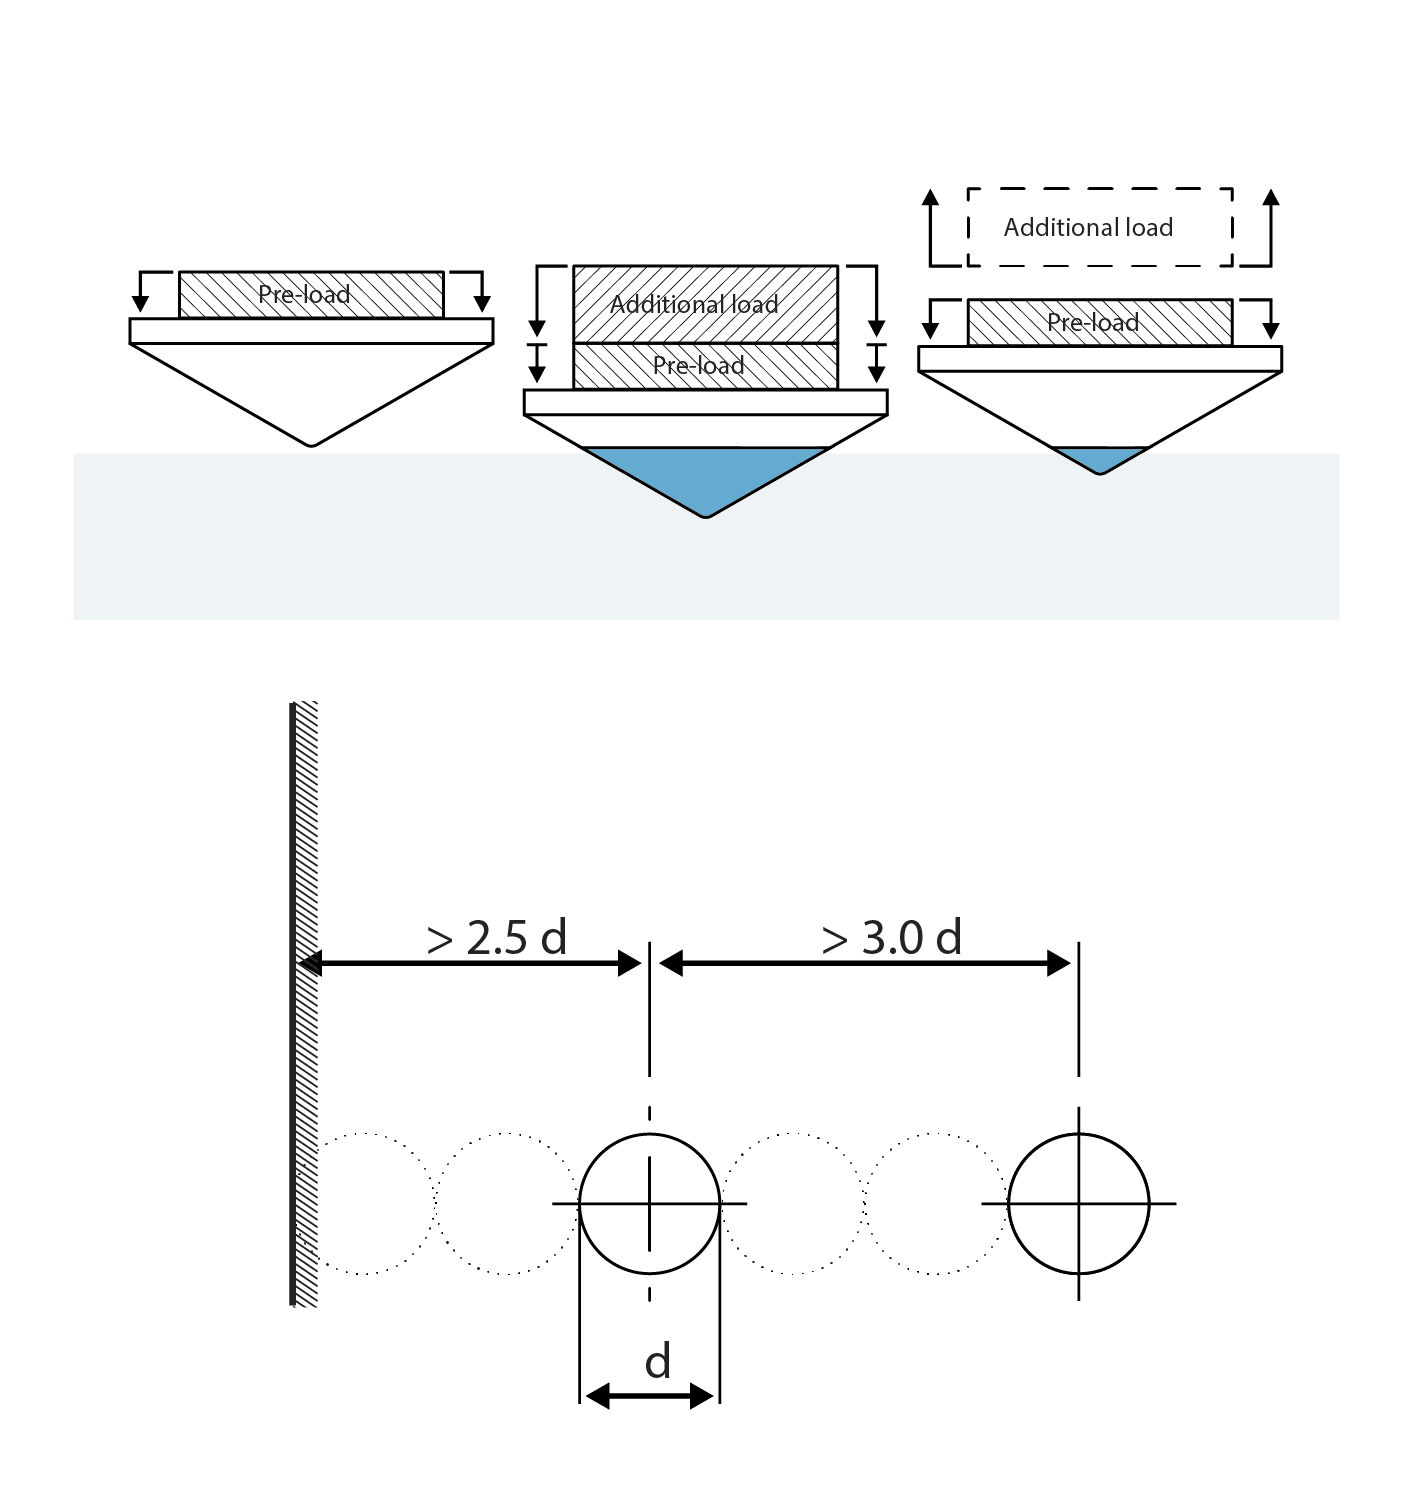
Rockwell hardness testing is determined in ISO, ASTM, JIS and other standards. It starts by the application of a preliminary test force (minor load or preload), directly followd by an additional load (main load) to reach the total applicable test load, and then finally returning to the preliminary test force (minor/pre load). The first minor/pre load determines the zero or reference position.
The major load is applied and held for a predetermined time (the dwell time) to allow elastic recovery of the material to happen. The major load is then is removed, while still maintaining the minor/pre load to establish the change from zero or refence position to determine a Rockwell hardness value.

Brinell hardness testers perform the oldest method of hardness testing still commonly in use today.
The method was invented in Sweden by Dr. Johan August Brinell in 1900. The Brinell hardness test is often used to determine the hardness of castings and forgings. The grain structure of these materials is too course for accurate Rockwell or Vickers testing.
Brinell hardness tests can be performed under different conditions and have approximately 25 different test force / ball combinations of testing. The method allows almost all metals to be tested by way of Brinell test by just varying the ball size and test force based on the sample’s dimension and shape. In most cases, as long as the ball size to test the force ratio remains to be constant, the outcome of test results are considered to be accurate when changing between Brinell test conditions.
The test results from a Brinell Hardness tester are used extensively in the industry as a basis of acceptance for commercial shipments, and for quality control procedures. These numbers or results can correlate with other metallic characteristics such as: tensile strength, wear resistance, ductility and others.
Brinell hardness testing procedure;
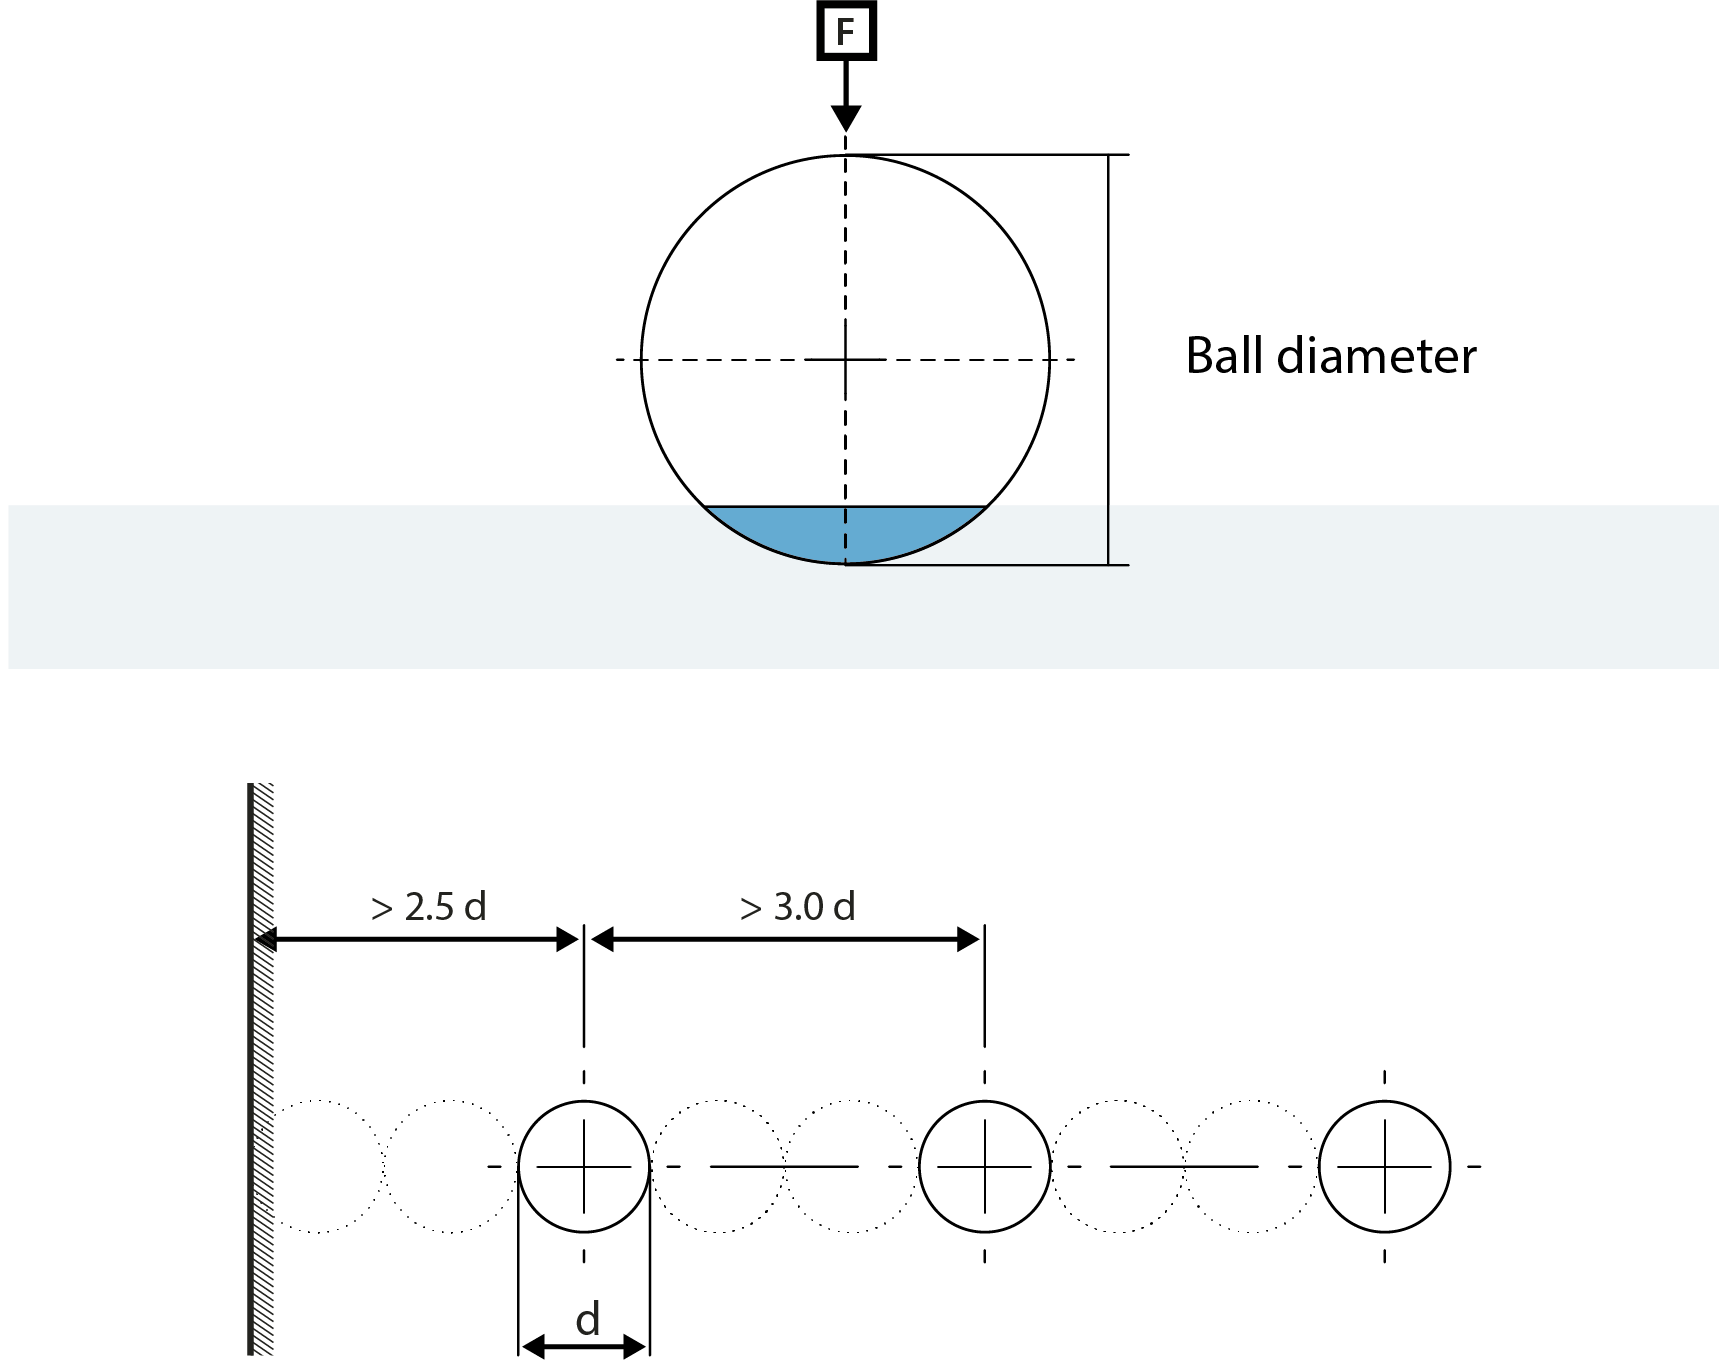
The Brinell hardness test can be explained as an indentation hardness test consisting of two actions or steps;
1.) Using a known ball indenter and apply a known force; apply the force through the known indenter perpendicular to the material under test and hold the force on the indenter for a specified amount of time aso know as ‘’dwell time’’.
2.) Measure the diameter of the ball indentation in at two (or more) directions perpendicular to each other. The Brinell hardness value is then calculated from the mean value of the diameter measurements using a mathematical formula developed for this purpose, or more from a chart based on the formula or nowadays by camera systems and software applications.

The principle of KNOOP hardness lays in the Vickers hardness testing method.
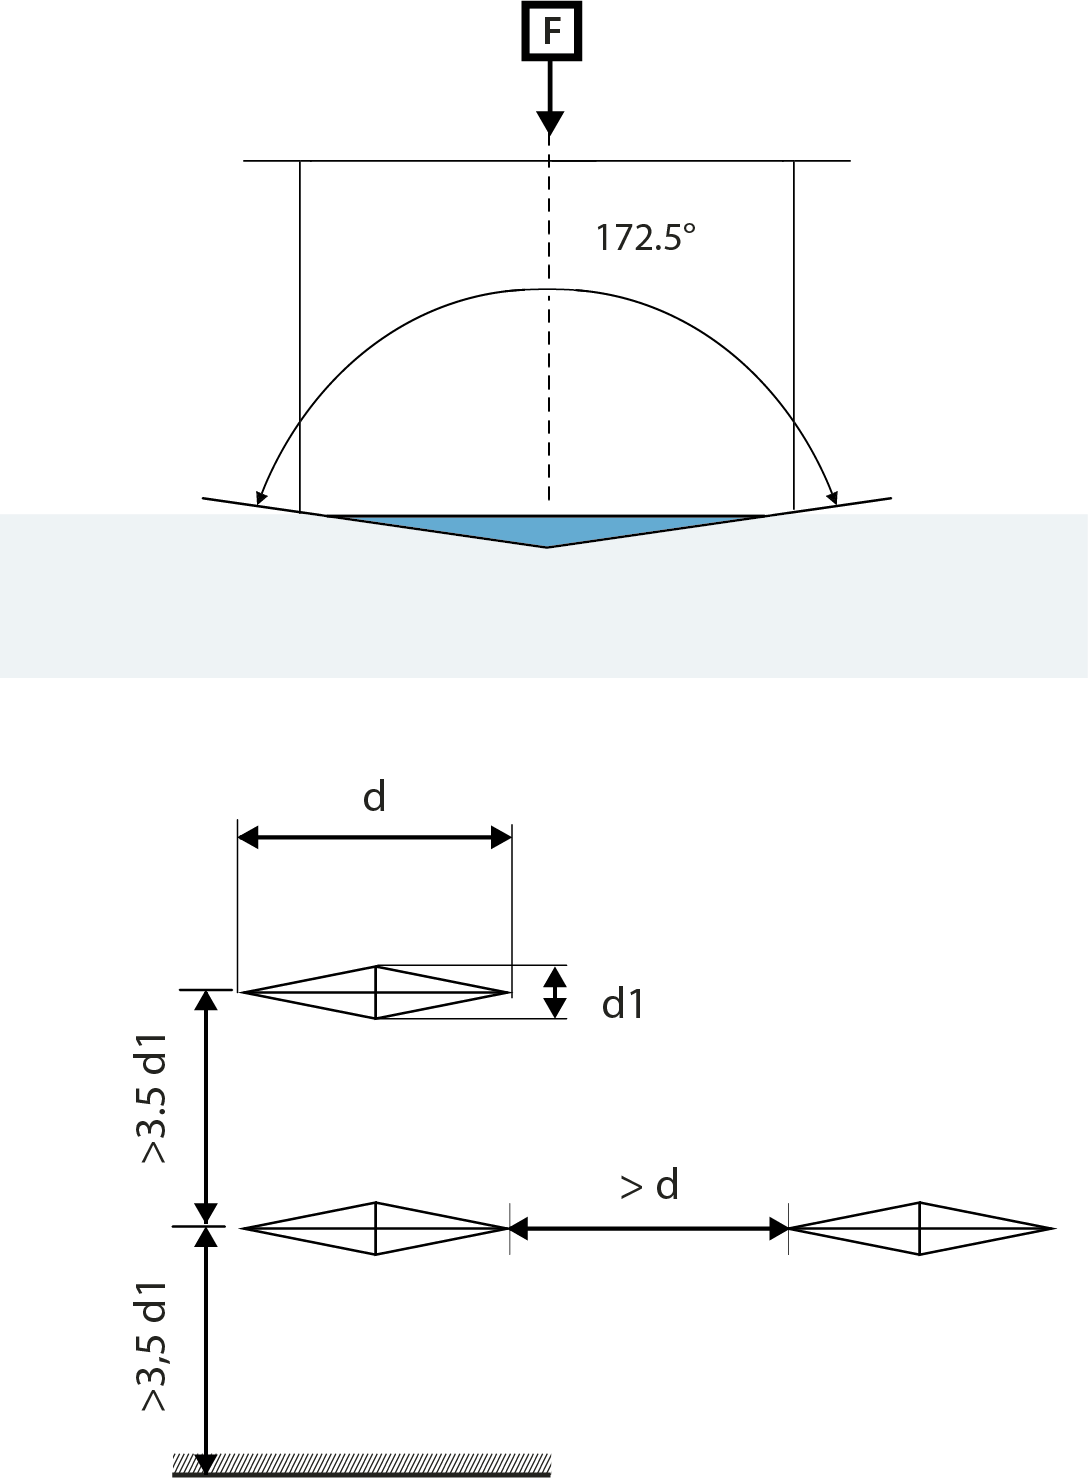
The Knoop diamond indenter has a significant difference between the long and short diagonals.
This shape is often better suited for determining variations of hardness over very small distances, edges of bushings, compared to the Vickers indenter. Also the angle of the diamond tip is different from a vickers diamond.
While the Knoop indenter resulting indentation is not symmetrical as the Vickers indention, it will also be subject to more variation of the resulting hardness values. This applies in particular to Knoop scales below 200gf.
Knoop hardness testing is not typically being used to define volume hardness testing, although at 500 gf, the ASTM standard provides conversions of Knoop numbers to other hardness test scales. Knoop tests are not commonly performed at test forces above 1000 gf while under particular circumstances and or materials may need higher forces like 2 and 5 kgf. Expect larger variations in results at these loads.
The specimen preparation procedure in removing preparation damage is of great influence on the test results; this becomes even more critical as the test force decreases.
