The Rockwell hardness testing method as defined in ISO 6508 & ASTM E18 is one of the most commonly used methods within the metal working industry around de globe, to determine the hardness of a material. It is also used within the plastics, new composite or carbon materials processing industries.
By applying a Rockwell test, the permanent depth of an indentation produced by a specified force/load and a specified penetrator, brale or indenter is being measured with high accuracy.
The Rockwell test does not require a lot of of sample preparation therefore making it the fastest and easiest hardness testing method to apply across many types of industries world wide.
The best advantage of Rockwell hardness testing is its rapid speed of testing and to display hardness values directly after penetrating the material with no need of microscopic evaluation.
How to perform a Rockwell hardness test?
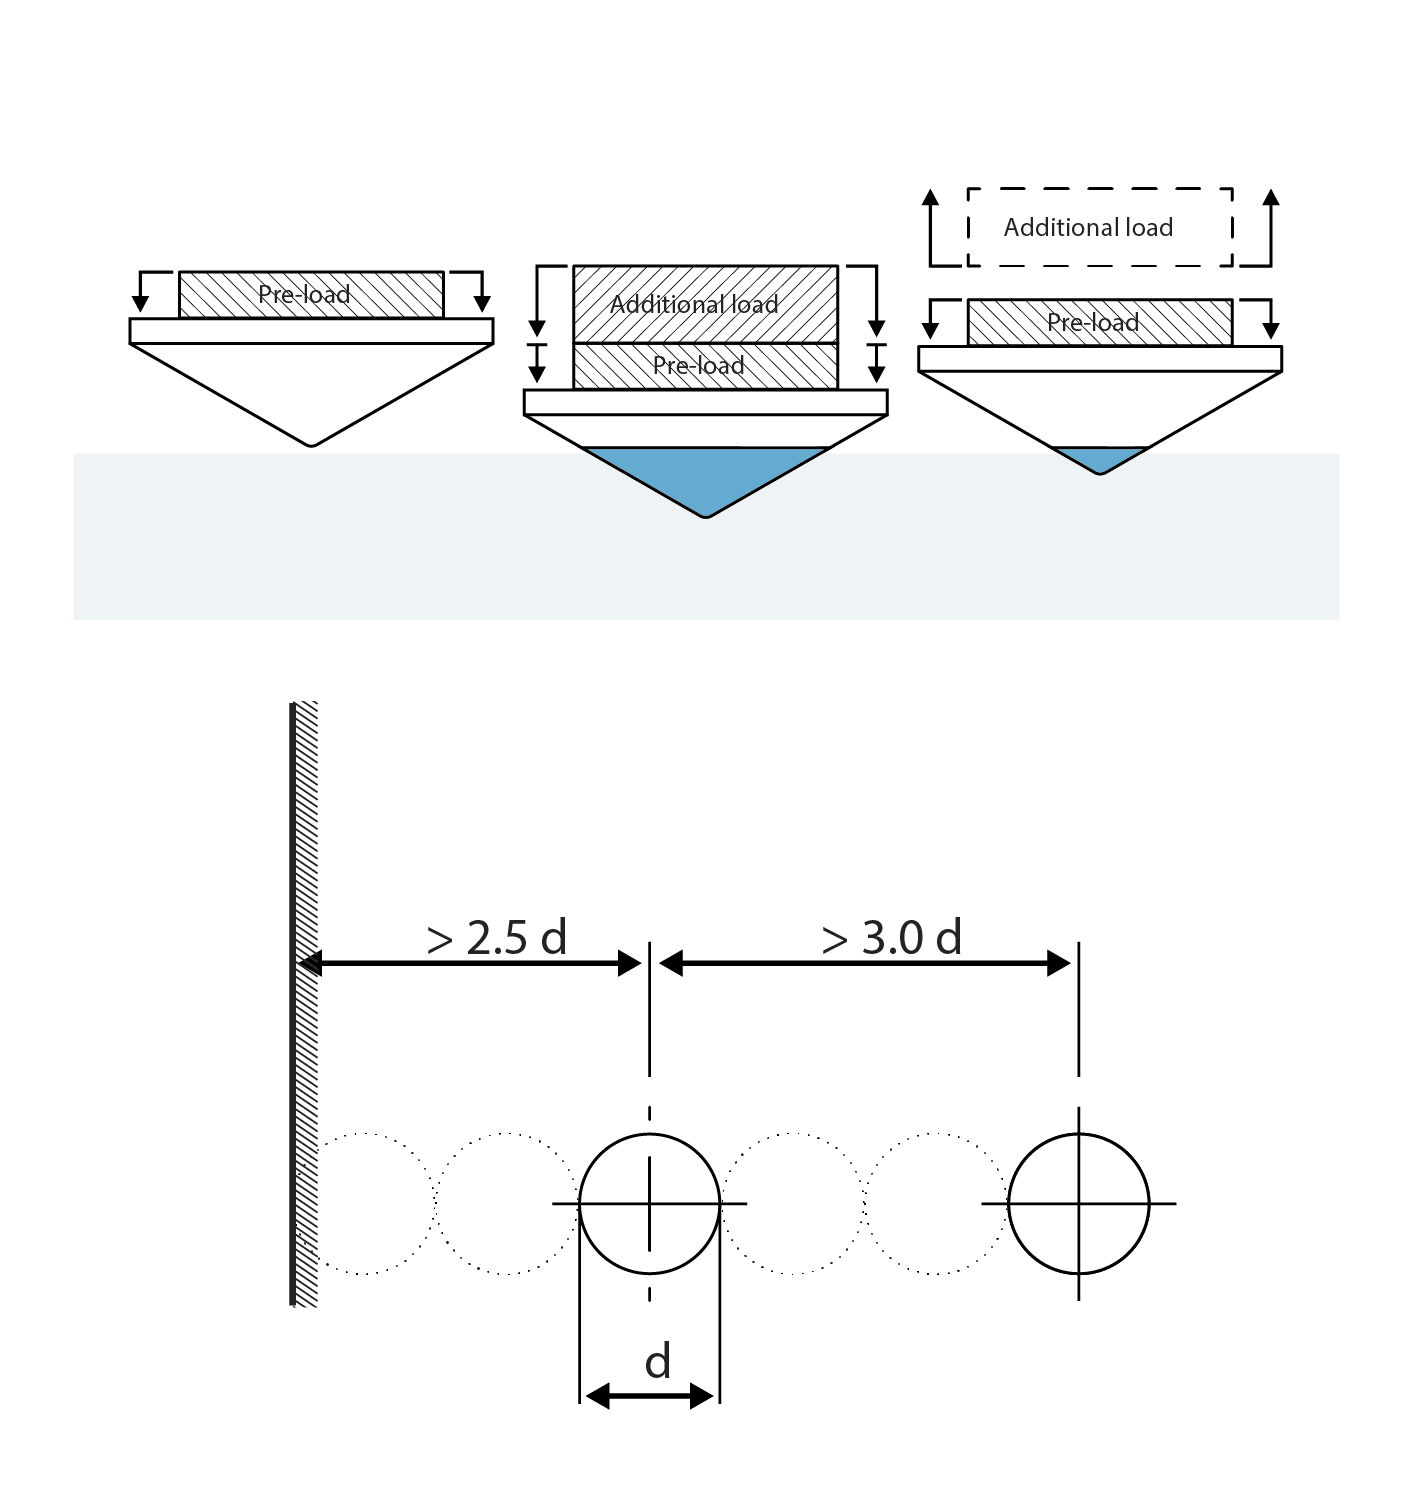
Rockwell hardness testing is determined in ISO, ASTM, JIS and other standards. It starts by the application of a preliminary test force (minor load or preload), directly followd by an additional load (main load) to reach the total applicable test load, and then finally returning to the preliminary test force (minor/pre load). The first minor/pre load determines the zero or reference position.
The major load is applied and held for a predetermined time (the dwell time) to allow elastic recovery of the material to happen. The major load is then is removed, while still maintaining the minor/pre load to establish the change from zero or refence position to determine a Rockwell hardness value.
